
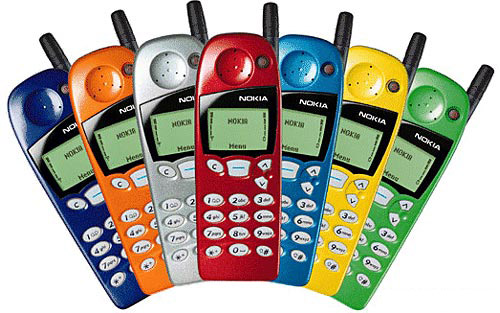
Είχα παραγγείλει πριν τα Χριστούγεννα ένα μικρό graphic LCD 84×48 pixel. Βασισμένο στο θρυλικό κινητό τηλέφωνο της Nokia 5110. Η τιμή αυτών των LCD κυμαίνεται από 1~3 € με χώρα προέλευσης την Κίνα. Είναι αρκετά βολικό για διάφορα projects και αρκετά εύκολο στον χειρισμό. Τα LCD αυτά οδηγούνται με δίαυλο SPI και βασίζονται στο ολοκληρωμένο κύκλωμα PCD8544 της Philips.
Τεκμηρίωση του ATmega8.
Τεκμηρίωση του PCD8544.
Το καλό είναι πως υπάρχουν πολλές έτοιμες βιβλιοθήκες. Μία που μου άρεσε με μία πρόχειρη ματιά που έριξα είναι γραμμένη από τον Fandi Gunawan (δείτε σχετικά στον κώδικα). Στα LCD αυτού του τύπου μπορούμε να απεικονίσουμε μονόχρωμες εικόνες 84×48 pixels. Ο ποιο εύκολος τρόπος είναι να σχεδιάσουμε σε κάποιο πρόγραμμα (π.χ. MsPaint σε Windows) μία μονόχρωμη (ασπρόμαυρη) εικόνα bitmap (bmp επέκταση) με διαστάσεις 84×48. Πρέπει η αποθήκευση της εικόνας να γίνει με βάθος χρώματος 1 bit. Στην συνέχεια μπορούμε να μετατρέψουμε την εικόνα αυτή σε κώδικα. Για την μετατροπή έγραψα ένα script σε Python (2.7) που χρησιμοποιεί την βιβλιοθήκη PIL (Python Image Library).
#!/usr/bin/python2.7

import sys
import re
from PIL import Image

if len(sys.argv) <= 1 :
   print "\nUsage: bmp2code file_name.\n"
   sys.exit()

# Try to open the file. If the file does not exist, quit the process.
try:
   with open(sys.argv[1]) as f: pass
except IOError as e:
   print "File",sys.argv[1],"does not exist."
   sys.exit()

bmp = Image.open(sys.argv[1])

width = bmp.size[0]
height = bmp.size[1]

frmt = bmp.format

# If the image is not a bmp file, quit the process.
if frmt != "BMP":
   print "The image type must be BMP."
   print "This image is:",frmt
   sys.exit()

# If the image is bigger than 84x48 pixels, quit the process.
if width != 84 or height != 48:
   print "The image should be monochrome (black & white) 84x48 pixels."
   print "This image is %dx%d pixels in size."%(width,height)
   sys.exit()

pix = bmp.load()

k = 0
l = 0
m = 0
byte = 0

# Checking every pixel to make sure it is a monochrome image
for i in range(0, 84):
   for j in range(0,48):
      if pix[i,j] != 0 and pix[i,j] != 1:
	 print "\nThis image does not seem to be monochrome.\n"
	 sys.exit()

name = sys.argv[1]

                                           # RegEx to remove the file extension.
print "\nstatic const unsigned char %s[] PROGMEM = {" % re.sub(r"\....","",name)
for t in range(0, 6):
   for i in range(0, 84):
      for j in range(0, 8):
         byte |=  (pix[i,t*8+j] << k)
         k = k + 1
         if k == 8:
	    k = 0
	    l = l + 1
	    print "0x%02x," % byte,
	    byte = 0
	    if l == 16:
	       print
	       l = 0

print"};\n"
Αν για παράδειγμα η εικόνας είναι η avr_logo.bmp εκτελούμε την εντολή python bmp2code.py avr_logo.bmp (504 bytes. 84×48/8=504). Η έξοδος φαίνεται στην παρακάτω εικόνα και μπορούμε να την αντιγράψουμε στον κώδικα μας.

Σαν παράδειγμα έφτιαξα ένα απλό… Μα τι άλλο! Ένα απλό θερμόμετρο :P. Με έναν Atmel AVR ATmega8 χρονισμένο στα 4 MHz.

Τα αρχεία με τον κώδικα κτλ υπάρχουν ΕΔΩ.

Hi there. Is the system working properly? Will I get a program in. Hex? Nice topic, I myself also build a thermometer, because I have a lcd from 3310. Can I get you e-mail to get more information?
I write the translator, sorry for the mistakes;)
To the link bellow you will find the source and the hex file (main.hex).
https://mega.co.nz/#!LsJRDBCS!C19Tm2PbCultfqhvUpzqQDz9t-ojwbkkLfHW9ElamXQ
Thank you. Writes only the hex file so? Will the rest of the files are too important?
Cool projects Mega8. I built a robot and other such inscriptions on the LCD 2×16, etc.
You are in Greece? I’m from Poland
If you make the circuit exactly as shown, you have only to write the hex file to the ATmega8. The frequency of the ATmega8 should be 4 MHz. The other file is the source code of the program. If you would like to make changes you must edit those files. After that you must build the main.hex again.
Yes, I am from Greece.
Welcome. What is the value R3? The system I work, but does not show the correct temperature because they do not know the value of R3. Regards
r3?
VCC= 5? v 3.3 v ?
Vcc is 5 volt. An R3 4.7k (4675). In order to achieve good accuracy you have to match that resistor or replace it with one of your one, place the exact value (measured with a good multimeter) to the code, and recompile the project.
Thank you very much Alex for really useful project! It would be great to build another one thermometric project that could deliver its data over cordless interface within the limit of the apartment (BT for instance). I mean when a customer wakes up in the morning then he might be interested in outdoor temperature just being lying in his bed in order to make his decision about what clothes should be used today, so on… It would be a kind of commercial device! Thanks again and please feel free to ask me for other MC ideas you can sell for money (well at least I think so))). I have more then three ones (of the MC gadgets) that may be of BIG commercial potential, but I can’t realize them here for I’m not good enough in programming. )) Alex.
I AM FROM MICROSOFT CONTROLLER DEVELOPMENT, I SAW YOUR PROJECT ON THE INTERNET FACEBOOK AND I WOULD LIKE TO OFFER YOU A LUMP SUM OF $100 FOR THE SCHEMATICS ,PINOUTS AND THE SOURCE CODES.
No need for money. The code is already available: https://www.dropbox.com/s/dj73hrgiuwuzv9s/NokiaLCD.zip